


 |
 |
 |
|
|
|
|||||||
| XT660Z Luggage, Racks & Panniers Discussion re luggage for he new Tenere |
 |
|
|
Thread Tools | Display Modes |
|
#
1
|
|||
|
|||
|
Pannier rails?
Hi gang,
how do the Yamaha pannier box rails fit to the bike? I have found a hole in the rear of the frame that i think the rails bolt to, but i cant see how you would tighten them up without taking the exhaust off. I am going to make some custom pannier rails for my soft luggage and want to use the same mounting point, but i cant see how i would get a bolt in from the inside then tighten it up... Any help please as i dont want to fabricate my own design only to find i cant get them bolted to the bike with ease. Crusty 
|
|
#
2
|
|||
|
|||
|
You don't have to remove the exhaust, but you do have to dis-assemble the rear of the bike to do it!
The Yam rails fit with a nut and bolt, through the hole you see - it's a pain to do.
__________________
>-------< Never underestimate the power of stupid people in large groups. 


|
| Sponsored Links |
|
#
3
|
|||
|
|||
|
Thanks for the reply mate, i sort of thought that would be the case but hoped for some easier way of bolting them on.
Will have to leave it till the weekend then as having the arse end of the bike hanging off is not good when i need the thing for work. Will post pics of custom made rails when i get them done. Only trouble is every time i think of what i need to go camping and how to get it on the bike with less/no hassle the rails get more complicated and exotic. Will end up looking like a Pikey caravan welded/bolted to the back end!!!!! Crusty |
|
#
4
|
|||
|
|||
|
Oi, Mark why not use the two mounting screws on the top of the rear, just at the back of the seat. That is exactly why MM use thair own bracket pickups as they didn't want to use those 'holes'. I think I may have a picture
Hope this helps. 
__________________
If I'm not working, I'll be 
Last edited by steveD; 17-06-11 at 09:42. |
|
#
5
|
|||
|
|||
|
Hi Steve,
i have a GIVI topbox bracket using those holes already so i will have to have a look to see what else i could get on there. I am hoping to sort a side rail that stays on the bike all the time, then some duffle bag hangers that i can fix and take off when the need arises. (Camping ect...) I am even sorting out storage space for the must have bag of charcoal.... LOL Should be sorted soon, when are we playing again? Is the Dragon the next one? I like the look of this place........ http://grizedale-camping.co.uk/ Crusty Last edited by theclowncrusty; 08-12-09 at 13:55. |
|
#
6
|
|||
|
|||
|
Quote:
Hhahahahahahahaoooooooohhhhaa Steve is a Yorkshireman. The smallest thought of paying Lakeland prices for a bit of field is enough to send him into a small frenzy, followed by a quick fit and a moan about how Yorkshiremen aren't realy tight at all..... 
I think Peatbog went to this one earlier in the year, but there is also another half decent one near Brotherswater on Kirkstone Pass.
__________________
>-------< Never underestimate the power of stupid people in large groups. 


|
|
#
7
|
|||
|
|||
|
TCC, I used the Yamaha holes when I made my pannier frames up a while back.

They are a bit of a pain to get to with the stock silencer in place, but it's only 3 bolts to remove it and it makes life easier. You'll have to- remove seat undo grab rail bolts from under plastic buttons (small flat screwdriver and 12mm socket) remove plastic cover from rear rack (10mm socket under the back on 2 x nylocs, 4mm allen key on the four button head bolts) This allows the rear light assembly to be moved forwards. loosen the exhaust link pipe clamp (10mm socket) Undo and remove the two bolts holding the silencer in place (12mm socket) and slide the silencer towards the back of the bike (I stand with the back of the bike in my gut and a hand either side) and then remove the silencer. You could make a very simple bar that ran straight from the top hole to the pillion pegs (actually that's a cracking idea, bagsy). Good luck. |
|
#
8
|
|||
|
|||
|
Heres what i have been up to today..........
Stripped the back end out of the bike and ended up with this.... 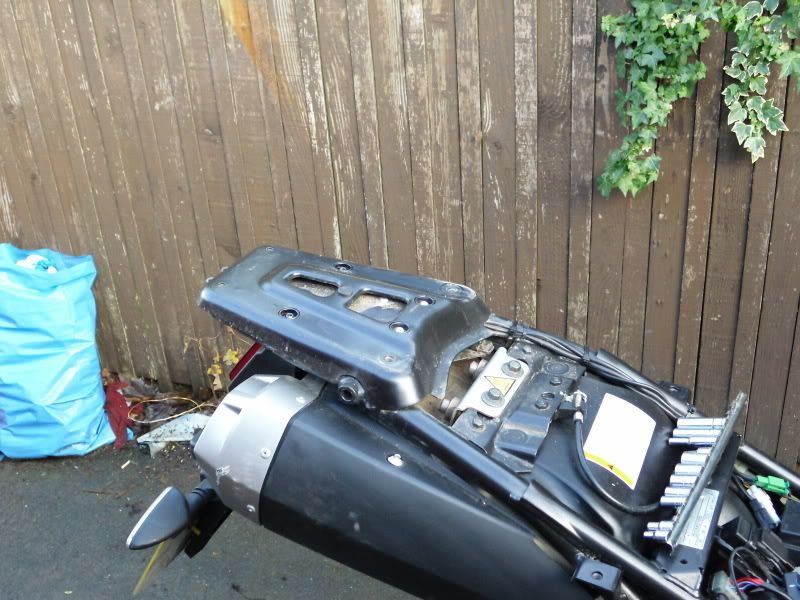
Thought i could make it a bit easier to fit my home made bars..... 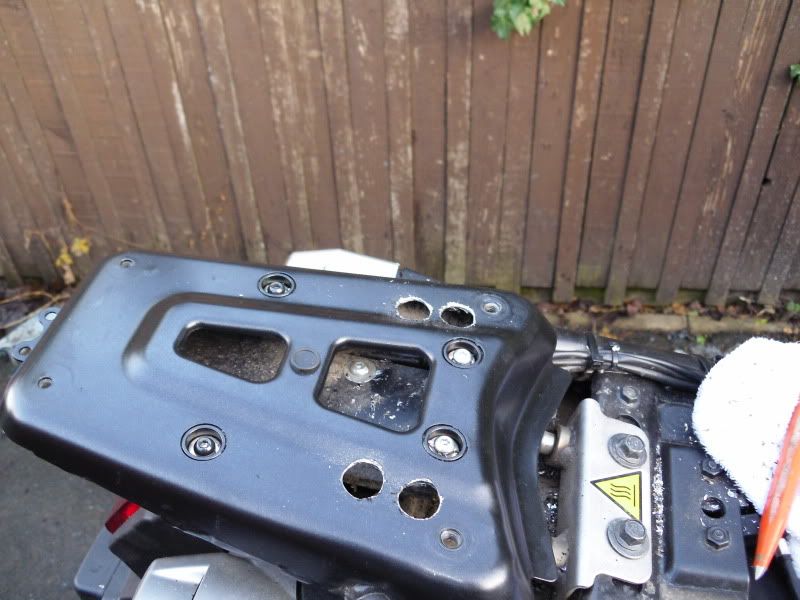
Drilled two holes, (starting small, then endidng up with these 13mm ones)....... 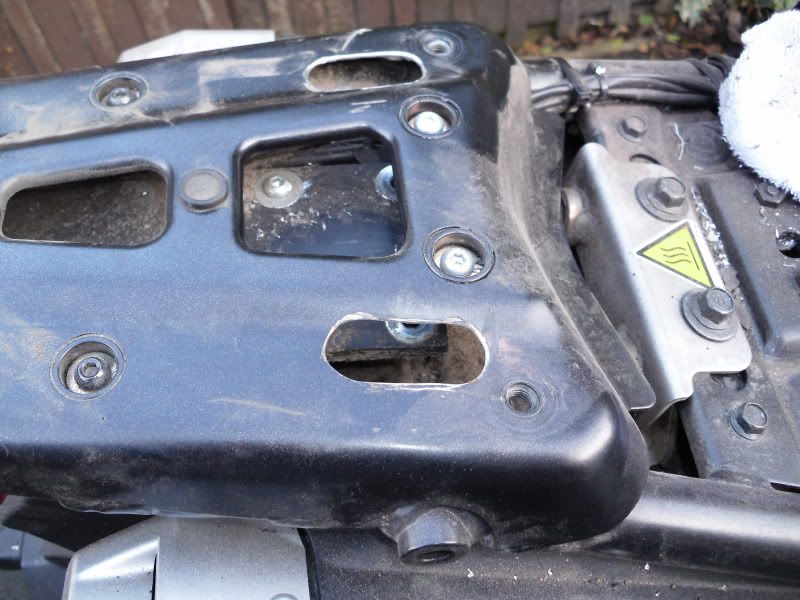
Got the Dremmel out to join the holes up........ 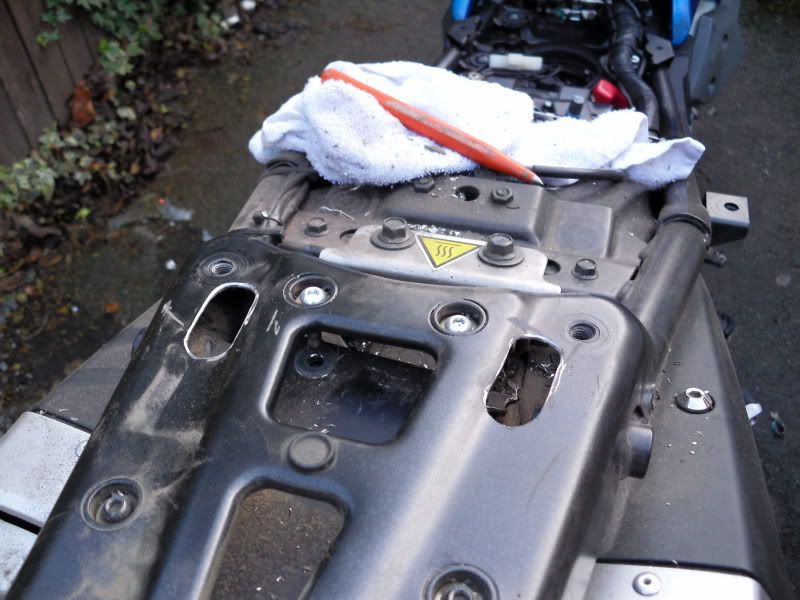
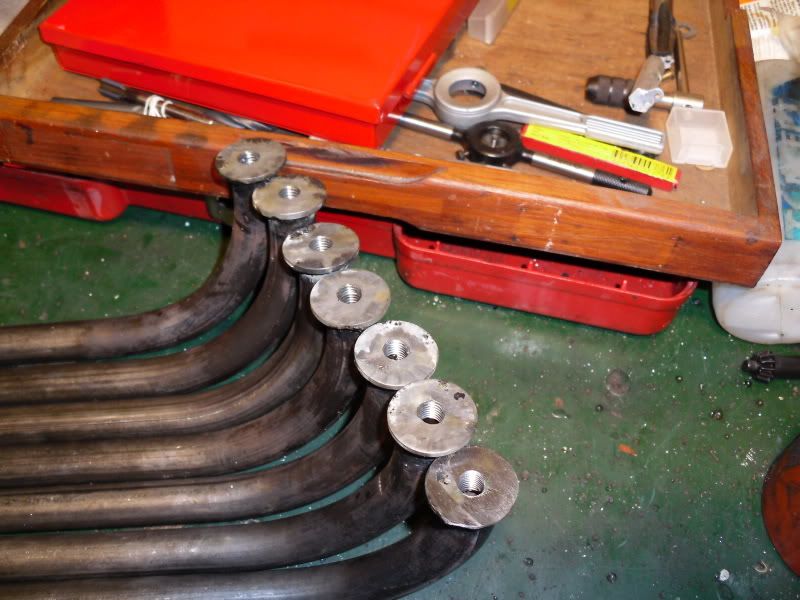
21x3mm pipe....... Its an arse to bend but is thicker then the frame tube so should last forever. 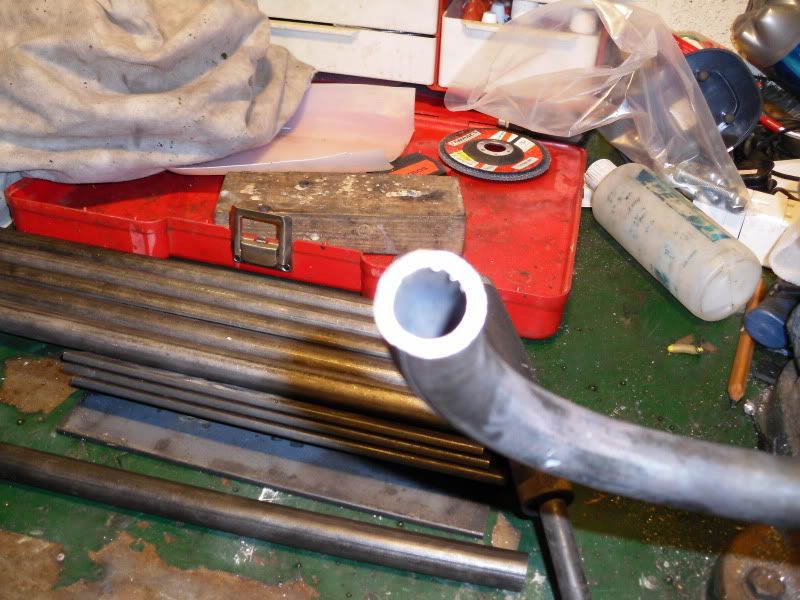
Bent to 90 degrees, then welded solid for about the last half inch...... 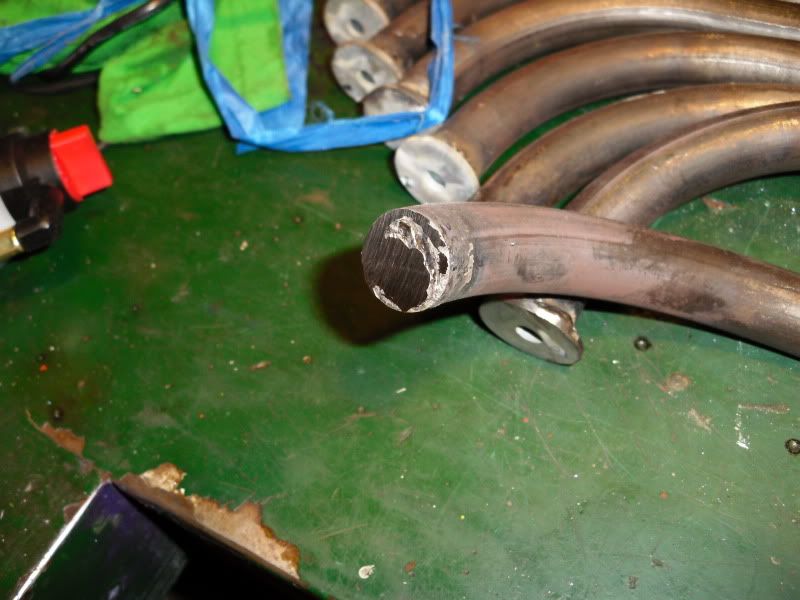
Ground flush, then washer welded on. (I might grind the washers off again, as they look out of place once pipe is fitted to bike, Let me know what you think?) 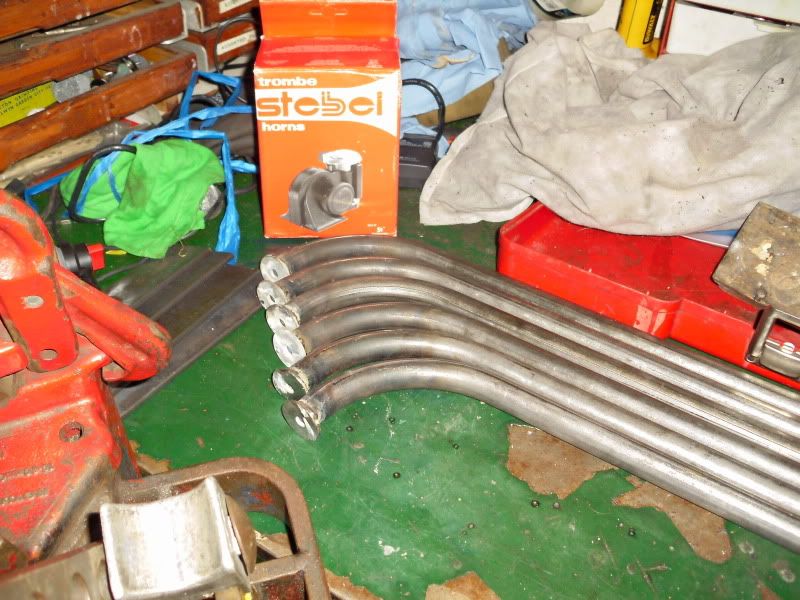
Drilled out, than tapped to M10 thread.......... 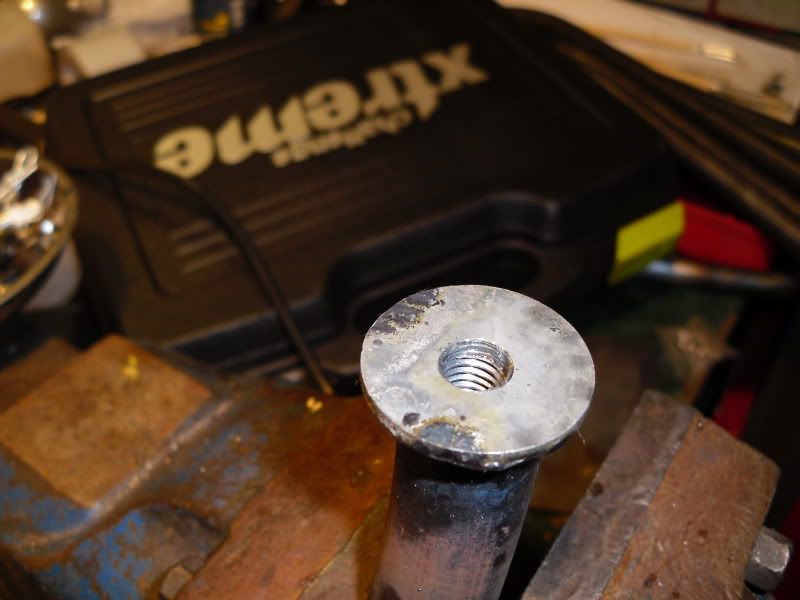
Fitted to the bike........ 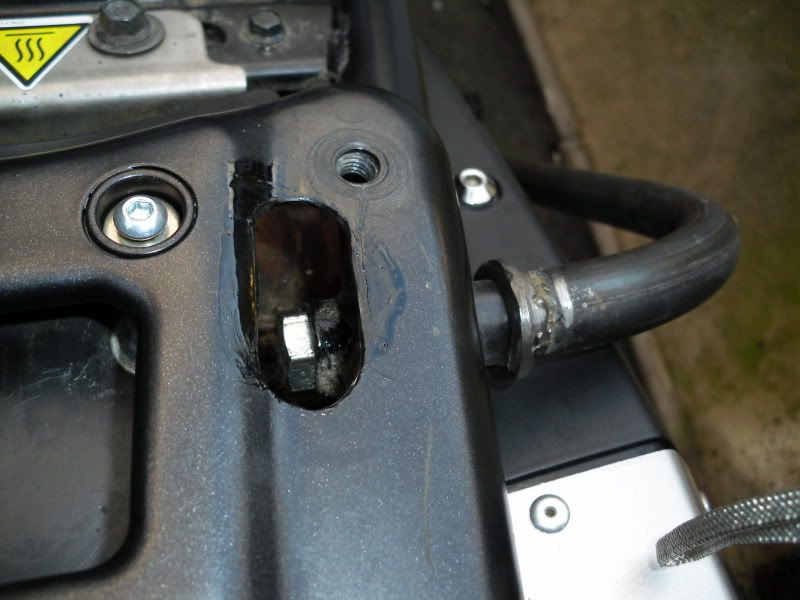
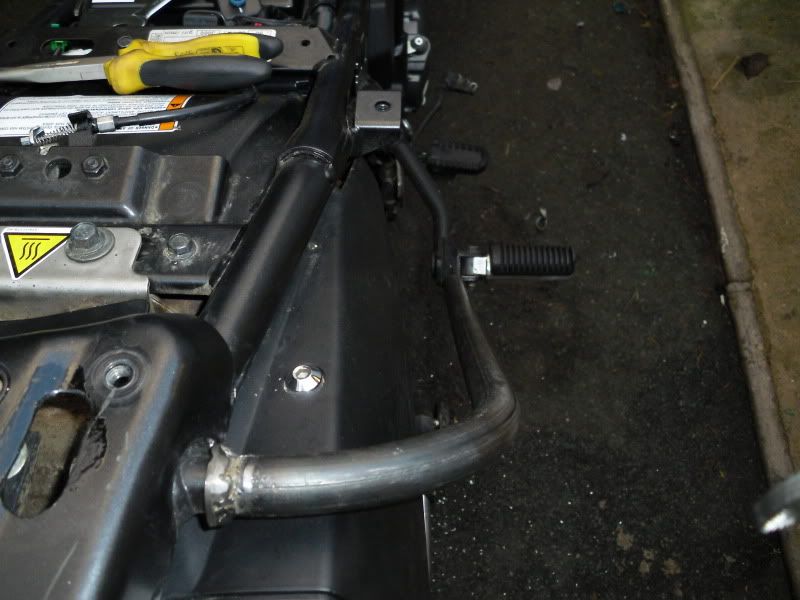
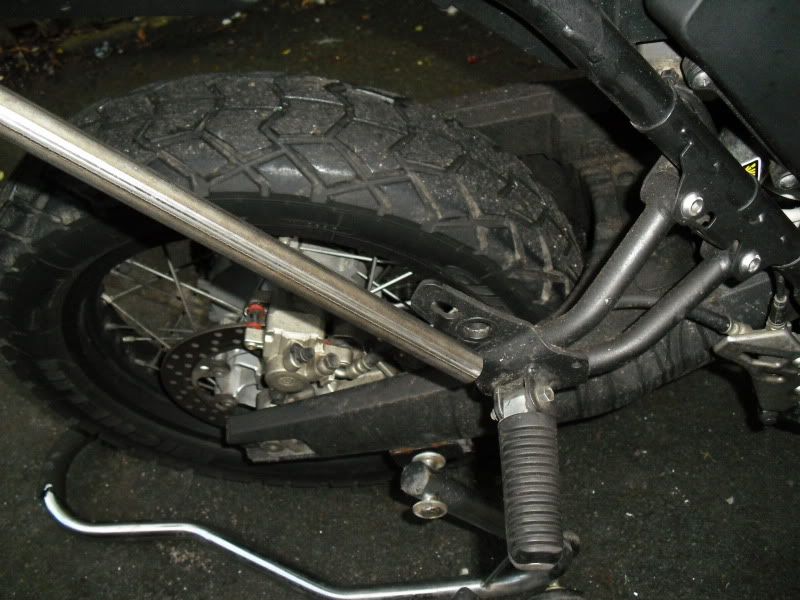
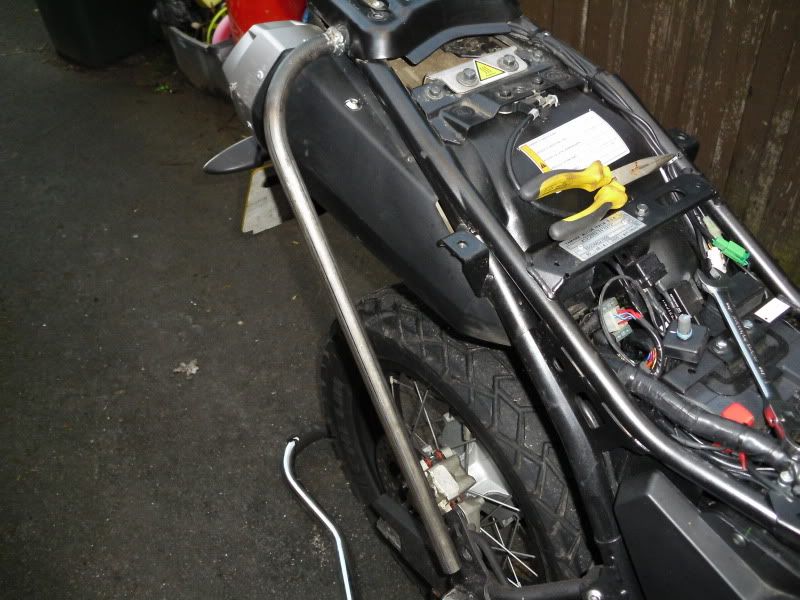
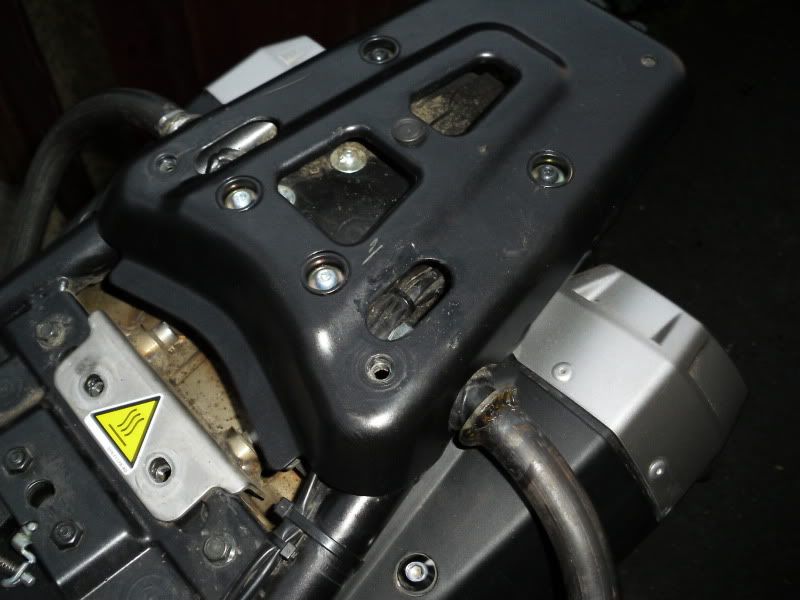
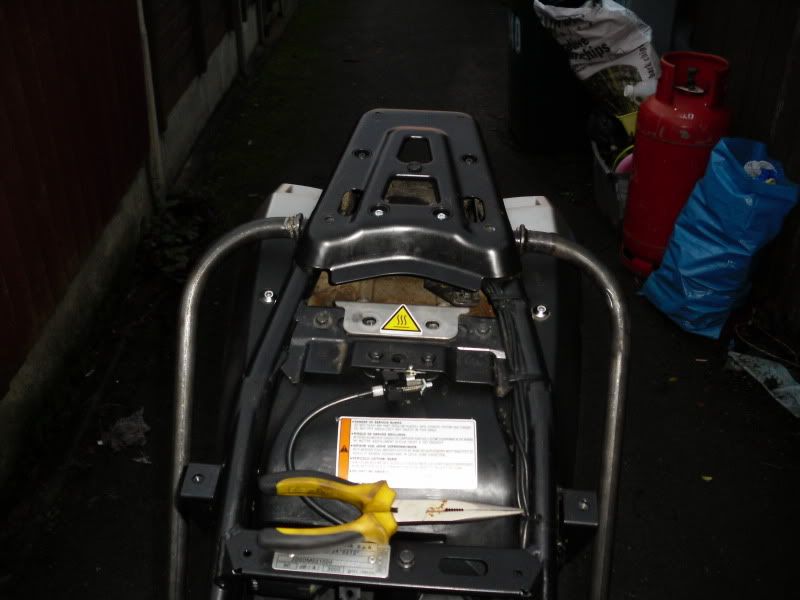
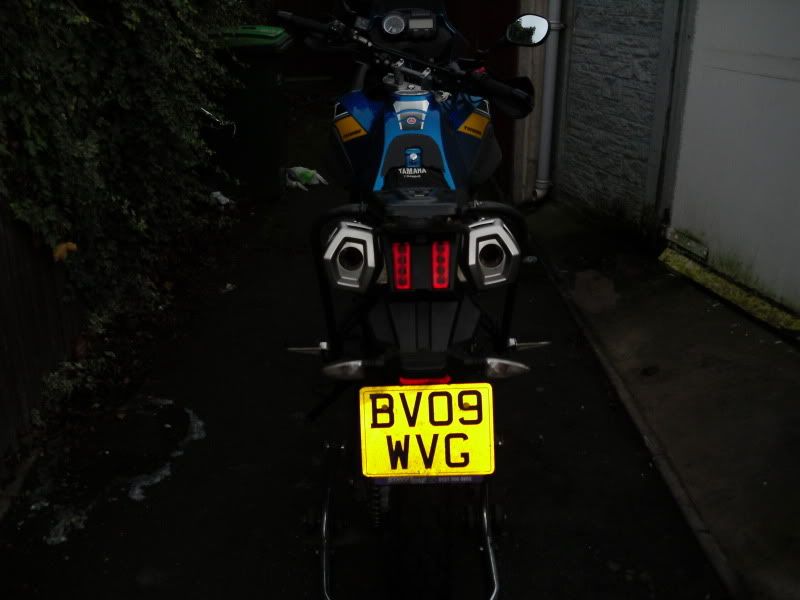
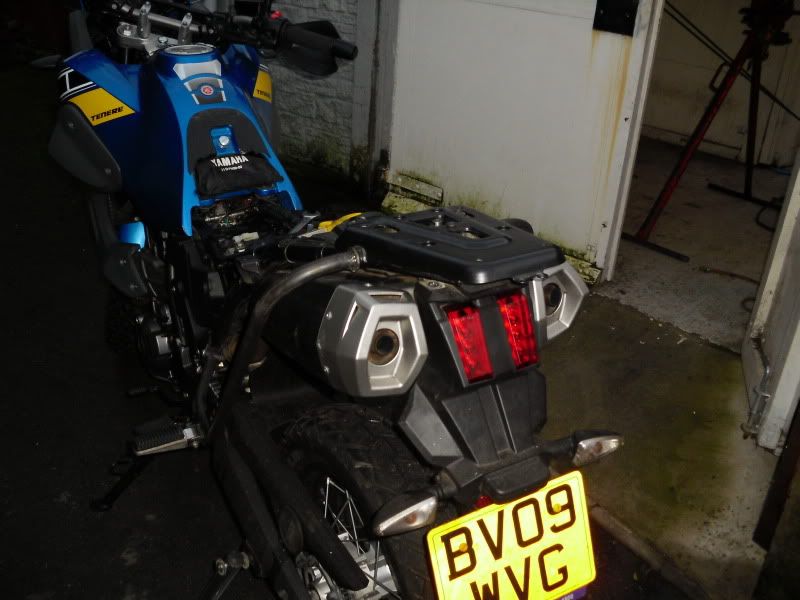
I have made enough for 4 sets, one for me, one for a friend. And two for any one who is interested. They will come in two versions, a simple bar to keep you soft luggage out of the back wheel, (much like the pics,) And the Crusty Desert, Pikey traveller version For more luggage carrying capacity. This version is still being finalised so keep watching........ Cut pipes, with footpeg brackets to be drilled and welded on....... 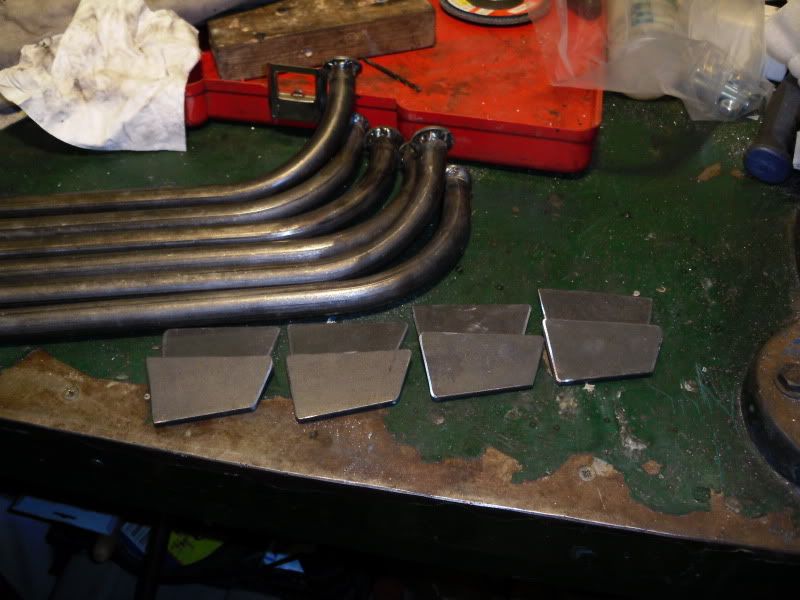
Bad light stopped play, so more to come tomorrow....... Crusty 
|
|
#
9
|
|||
|
|||
|
Pleased you liked my idea
 Looks good. Looks good.
|
|
#
10
|
|||
|
|||
|
You dont need to remove anything to fit the yamaha Pannier rails. Except the seat.
What you need is the following a cable tye that has an outside diameter the same'ish as the pannier nut hole. Then you put this throught the hole under the frame look at pictures in above post. Then you can slide the nut up the cable tye until you have it against the bike frame. Hold it with you fingers. Tight fit with my littles suasages. Slide the cable tye out and put the allen bolt into the nut, and finger tighten. Then get an open ended spanners and slide it between the exhaust and the pannel at the number plate side until you find the nut. Then you can hold the nut while you tighten the allen bolt... Then tighten the front one as it is easier to get too.  .gif" border="0" alt="" title="Bigwink" smilieid="588" class="inlineimg" /> .gif" border="0" alt="" title="Bigwink" smilieid="588" class="inlineimg" />
__________________
Colin 


 My Mods - Peatbog rear rack
My Mods - Peatbog rear rack  
|
 |
| Thread Tools | |
| Display Modes | |
|
|